

Understanding Strut Spring Compression
Compressing a strut spring is a critical phase in front suspension repair and routine strut replacement. Because the spring holds the vehicle's weight and maintains ride height, managing its high kinetic tension requires precise technique and reliable equipment.
Why You Need to Compress a Strut Spring
- Safe Disassembly: The coil spring sits under constant pressure against the top mount. Compressing the spring relieves tension on the strut nut, allowing for safe disassembly.
- Component Service: Essential for replacing worn shocks and struts, damaged mounts, bearing plates, or sagging springs.
- Suspension Upgrades: Installing new performance or heavy duty suspension components requires compressing the spring to seat it onto the new strut body.
Key Safety Hazards and Risks
- Extreme Kinetic Energy: Uncontrolled spring decompression can launch metal components with lethal force.
- Tool Instability: Using improper tools or uneven clamping can cause the coil spring compressor to slip, releasing energy instantly.
- Structural Fatigue: Damaged, deeply rusted, or fatigued springs can fracture under the stress of manual compression.
Essential Tools for Compressing Strut Springs
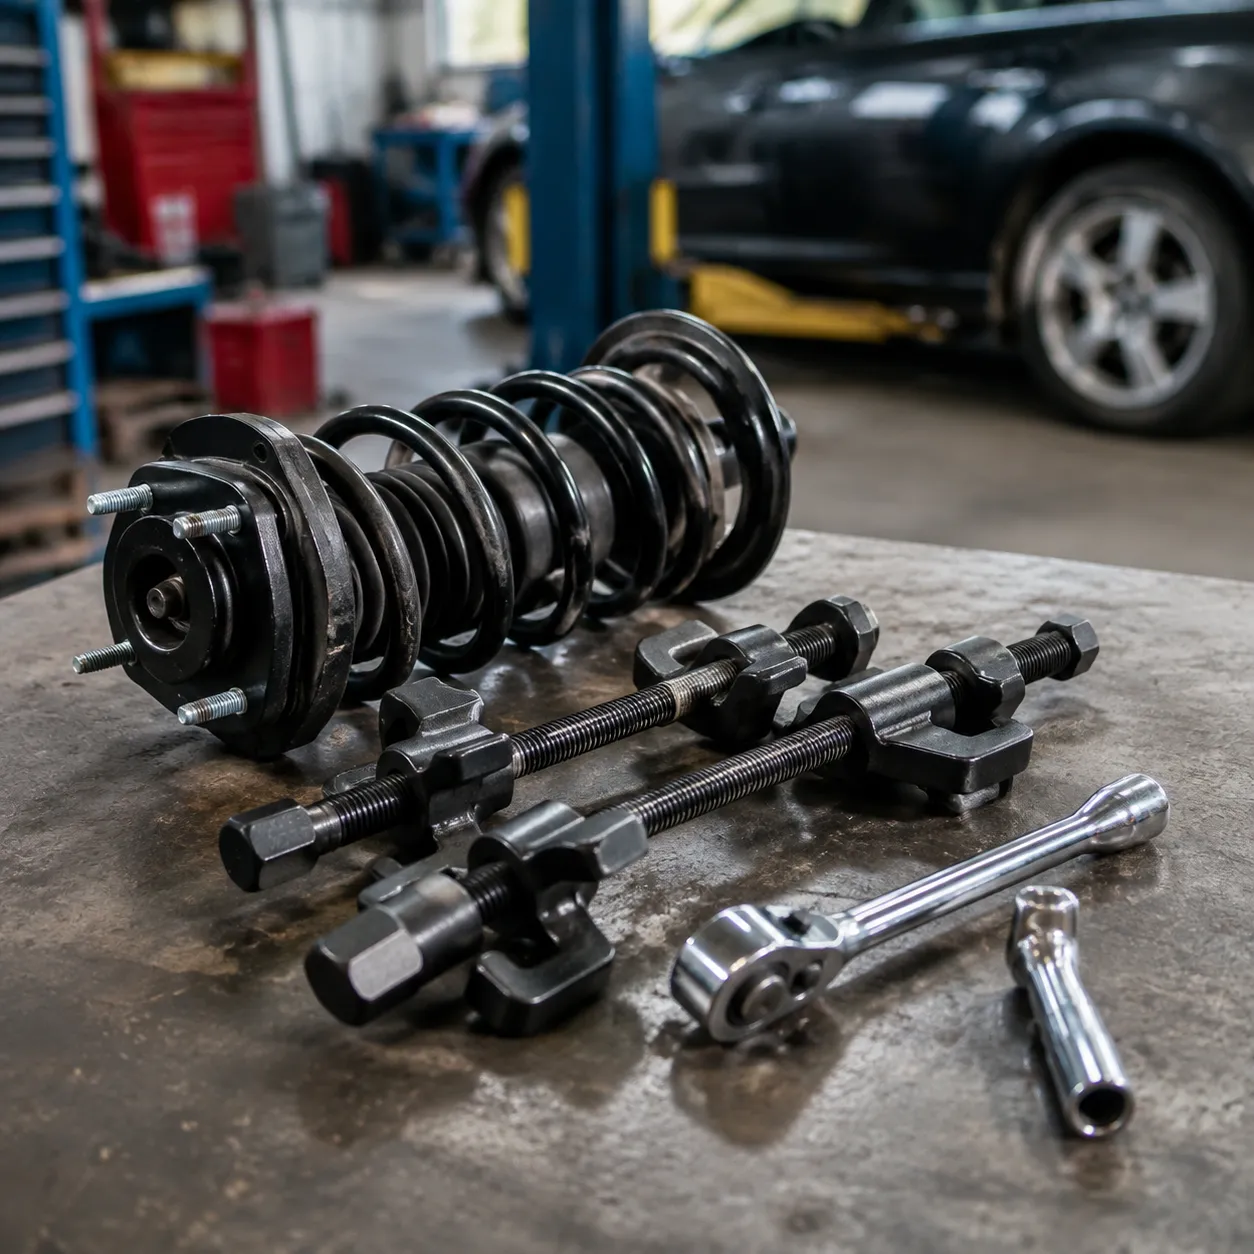
Having the right equipment is non-negotiable when compressing a strut spring. Working with high tension requires specialized gear to keep the process safe, fast, and straightforward during any front suspension repair.
Types of Spring Compressor Tools
Choosing the correct coil spring compressor depends on your setup and the job scope:
- External Hook Compressors (Dual Rod): The most common choice for a standard MacPherson strut. These attach to opposite sides of the coil to pull the spring down evenly.
- Bench-Mounted Compressors: Wall-mounted or floor-standing units that offer superior stability and speed for busy shop environments.
- Pneumatic Spring Compressor: Powered by compressed air, this option makes light work of stiff coils on heavy duty suspension setups.
For a complete breakdown of features and safety ratings, explore our detailed strut spring compression tool guide before starting your project.
Required Hand Tools and Protective Gear
Along with the primary compressor, gather these crucial hand tools and safety items before servicing shocks and struts:
- Hand Tools:
- Ratchet Wrench & Deep Sockets: Used to crank manual compressor rods down smoothly and evenly.
- Pass-Through Socket Set: Allows you to hold the center strut shaft while unbolting the top strut nut.
- Torque Wrench: Vital for reassembling the unit to exact vehicle specs after a strut replacement.
- Personal Protective Equipment (PPE):
- ANSI-Rated Safety Glasses: Crucial defense against debris or unexpected movement.
- Heavy-Duty Leather Gloves: Keeps your hands protected from sharp pinch points and greasy surfaces.
Step-by-Step Guide to Compressing a Strut Spring
Safely tackling front suspension repair requires patience and strict adherence to proper mechanical procedures. As spring manufacturing experts, we design high-tension components to handle massive loads, meaning improper handling during maintenance can lead to sudden, hazardous releases of stored energy. Following a disciplined process ensures work proceeds safely and effectively.
Step 1: Remove the Strut Assembly from the Vehicle
Before handling the spring itself, isolate the complete MacPherson strut from your suspension system:
- Secure the Vehicle: Park on a level surface, set the parking brake, and lift the vehicle using a hydraulic jack. Lower it onto heavy-duty jack stands and remove the wheel.
- Disconnect Peripheral Lines: Unbolt brake hose brackets, ABS wheel speed sensor wiring, and stabilizer bar link ends attached to the strut body.
- Unbolt the Assembly: Remove the lower clevis bolts holding the strut to the steering knuckle. Support the assembly from underneath, then remove the upper mounting nuts inside the engine bay. Carefully lower the assembly out of the wheel well.
Step 2: Position and Secure the Spring Compressor
Mounting your compression equipment correctly prevents tool slippage under heavy loads. For detailed technical advice on tool selection and safety protocols, check out our comprehensive strut spring compression guide.
- Secure the Strut: Clamp the lower mounting bracket into a bench vise to keep the assembly stationary during service.
- Attach Compressor Jaws: Position the hooks of a dual-jaw coil spring compressor on opposite sides (180 degrees apart) of the spring. Ensure the tool covers as many active coils as possible while leaving room to access the top and bottom seats.
- Engage Safety Locks: Double-check that all safety pins or locking latches on the tool hooks are fully engaged around the wire diameter.
Step 3: Evenly Compress the Coil Spring
When compressing a strut spring, balance is critical to prevent dangerous bowing or binding.
- Alternate Sides: Use a standard ratchet wrench to turn the compressor drive bolts. Rotate each bolt 3 to 4 turns at a time, constantly switching back and forth between sides.
- Maintain Equal Tension: Both sides of the tool must travel down at the exact same pace to keep the spring straight.
- Check for Clearance: Stop tightening as soon as the spring separates slightly from the upper strut mount and lower spring seat. You only need enough clearance to relieve tension off the mounting hardware—never over-compress.
Step 4: Remove the Strut Top Nut and Components
With tension off the upper mount, disassembling the rest of the unit is straightforward. For additional insights on selecting heavy-duty equipment for shop work, consult our spring compressor buying and safety guide.
- Hold the Piston Shaft: Insert a wrench onto the top of the center piston rod to prevent it from spinning while unbolting hardware.
- Remove the Center Nut: Use a box wrench or pass-through socket to remove the main center strut nut.
- Disassemble Upper Hardware: Lift off the upper strut mount, bearing plate, upper spring seat, dust boot, and rubber bump stop in sequence. Keep all components organized in the exact order they were removed to streamline reassembly.
Reassembling the Strut and Releasing Tension
Rebuilding your shocks and struts assembly requires precision and steady hand movement. Once the replacement strut cartridge or spring is positioned, handling the high potential energy of the coil spring demands absolute focus.
Installing Components onto the Compressed Spring
- Align the Damper Shaft: Slide the shock shaft straight up through the center of the compressed coil spring.
- Position Mounts and Insulators: Place the lower and upper rubber isolators, dust boot, bump stop, and top mount assembly onto the shaft.
- Seat the Spring Ends: Verify that the ends of the coil spring rest firmly against the molded stops in both the upper and lower mounts.
- Thread the Strut Nut: Hand-thread the new strut nut onto the top of the shaft to prevent cross-threading before applying final torque.
Slowly Releasing Tension on the Spring Compressor
- Alternate Sides: Turn the drive bolts on your coil spring compressor in small, equal turns—about two to three revolutions per side.
- Monitor Alignment: Ensure the spring expands evenly into the rubber seats without shifting out of alignment.
- Verify Safety: Follow proven steps to compress a spring safely and avoid damage throughout the decompression phase.
- Remove Tools Safely: Once the spring tension fully transfers to the strut mounts and the compressor hooks go loose, remove the tools by hand.
- Torque: Use a torque wrench to tighten the top nut to factory specifications while holding the center shaft stationary.
Critical Safety Tips and Common Mistakes to Avoid
Compressing a MacPherson strut spring stores extreme kinetic energy. As a professional mechanical springs manufacturer, we always stress that improper techniques during front suspension repair can lead to catastrophic tool failure or severe injury.
Avoiding the Use of Impact Wrenches on Manual Tools
Never use an electric or air impact wrench on a manual coil spring compressor. The severe force spikes from power tools strip threaded drive rods and snap cast safety hooks.
- Friction Damage: High-speed rotation generates friction heat that galls steel threads.
- Manual Control: Use a standard ratchet wrench or breaker bar to feel binding resistance early.
- Thread Care: Apply heavy-duty grease to the tool's main screws before tightening.
- Power Tool Exceptions: Limit impact tools strictly to dedicated wall-mounted or pneumatic spring compressor stations.
Ensuring Equal Tension on Opposite Sides
Uneven clamping forces the coil to bow sideways, which can cause the compressor hooks to slip violently off the spring.
| Action | Execution Method | Target Result |
|---|---|---|
| Hook Placement | Set jaw sets exactly 180° opposite on the coils. | Keeps the compression axis parallel. |
| Nut Rotation | Alternate 5 to 10 turns per side continuously. | Prevents coil bowing and crooked loads. |
| Safety Check | Confirm complete spring looseness before removing the strut nut. | Ensures zero force on the upper mount. |
When selecting robust equipment for high-stress servicing, review our clutch spring compression tool guide for insights on managing heavy mechanical loads safely.
Knowing When to Seek Professional Repair Services
Servicing typical shocks and struts requires caution, but certain scenarios demand industrial floor-standing machinery.
- Heavy Duty Suspension Springs: Truck, SUV, or lowered performance coils feature thick wire diameters and high spring rates that overpower portable hand tools.
- Corroded Coils: Rust flaking off a spring indicates structural weakness, raising the risk of sudden fracture under load.
- Damaged Dampers: If a bent piston rod prevents smooth travel, forcing the assembly creates unpredictable dynamic tension.

